Our 50s Kitchen Renovation - Cabinet Restoration
Some of our Youngstown Kitchen brochures
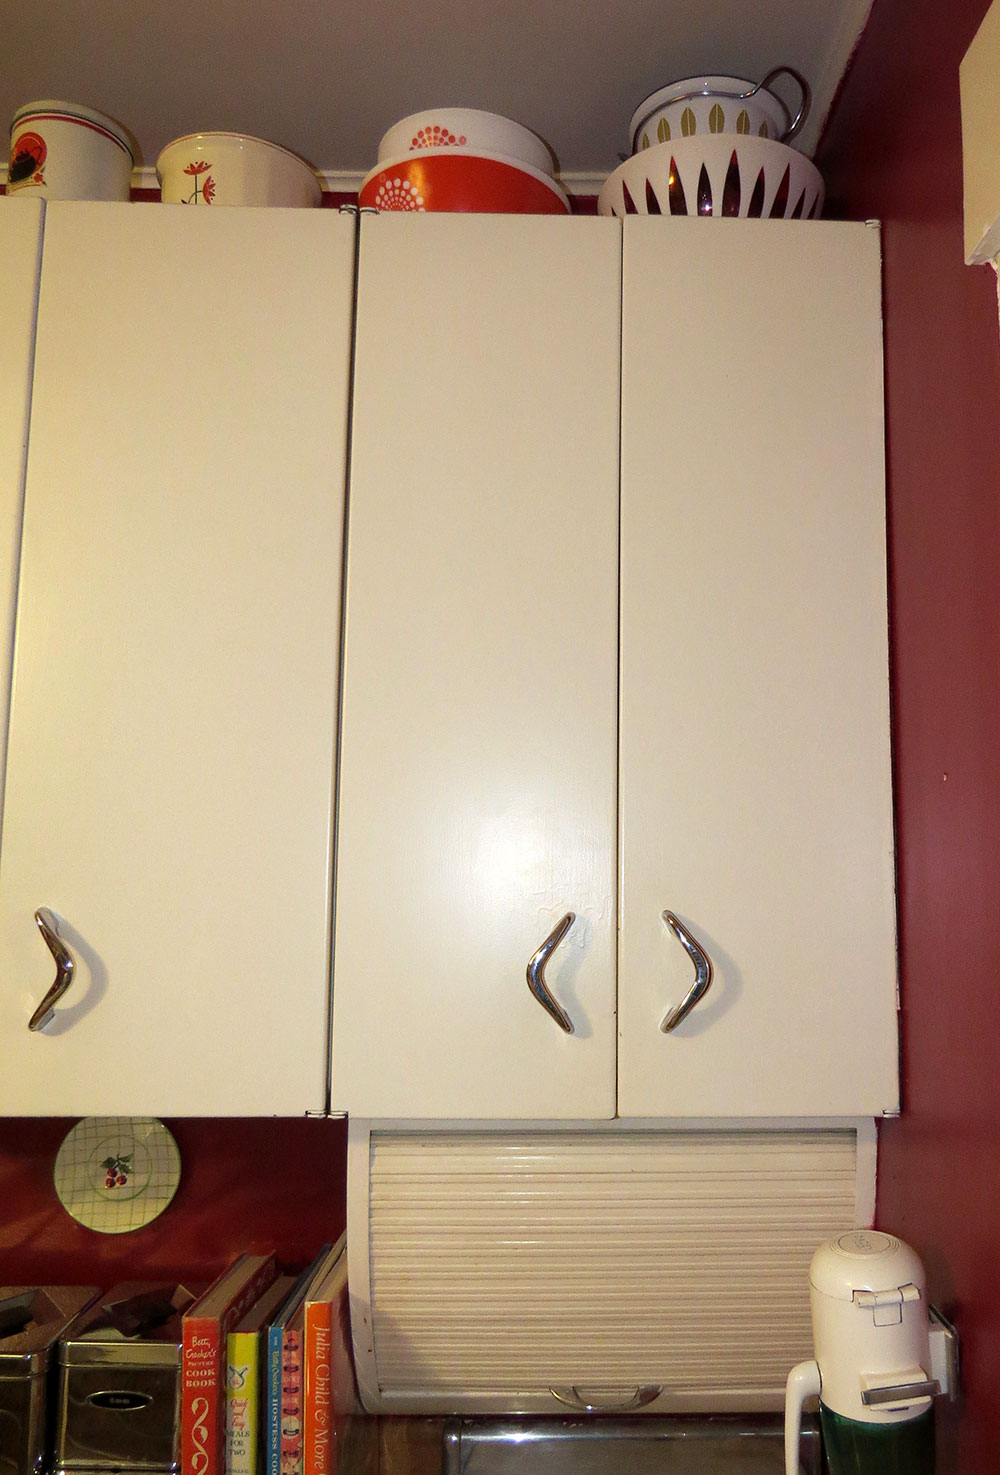
Last August, I began to refinish our cabinets for the kitchen renovation. From the very moment we moved into our house, we loved the original Youngstown cabinets and the thought of throwing them out and replacing them with newer ones never crossed our minds. We loved the clean simple look, the fact that they were metal and the chrome boomerang-shaped pulls and also loved that the countertops that went with the Youngstown cabinets were trimmed with elegant, rounded, chrome-edged backsplashes and nosing.
When we moved in, we had 13 pieces of vintage Youngstown cabinetry. There were 7 upper cabinets, 4 lower cabinets, a roll-top spice rack and a broom closet which had long ago been sent to the barn as storage. The sink base had been replaced with a cheap melamine cabinet that wasn't very nice and didn't match anything else.
Lower cabinet with original Formica and bull-nosed metal edging.
Upper cabinets with roll-top spice rack
Original lazy-susan
We knew that when we started to renovate we would need to either have matching cabinets made or find someone selling vintage Youngstown cabinets to fill in the missing spaces. For a few years, I poked around eBay and Craigslist, looking for sets of cabinets. Often I would see one single piece for sale, or very expensive full sets. Last spring, I finally found a full set on Craigslist being sold for only $500, located in Warwick RI. I contacted the seller and agreed to meet so I could take a look at them and make sure they weren't in terrible condition. What I found was a huge set that was in decent shape. I knew they would have to be cleaned up and refinished, but for the most part they didn't have any rust, the hinges were present and working and all the door pulls were accounted for. There were two pieces, the sink base and a 24" lower cabinet that had rusted completely through, but I figured we may be able to salvage them, so decided to go ahead and buy the whole lot.
I only had room in my car for a couple of cabinets, so arranged to come down that weekend with a U-Haul to get the rest. Chris and I booked a room in Warwick and drove down on Saturday and spent the day poking around the area. We rented a 15' U-Haul box truck while we were down there and Sunday met the seller to pick up the rest. I drove my car back, with a few more cabinets and Chris drove the U-Haul with the rest. When we got home and looked at the pile of cabinets we just picked up, I momentarily panicked. What had I gotten myself into? This was going to be a ton of work!
Pile o' cabinets, ready to be refinished.
One of the lower cabinet before refinishing
I got started on the cabinets as soon as I could. My first step to remove all of the drawers, doors and bases. I then gave them a good cleaning. The cabinets from Rhode Island had first come out of an apartment and then had sat in a garage for at least a year. Needless to say, they did not look or smell very good. I cleaned them first with soap and water and then applied Krud Kutter. We learned that the cabinets had been repainted with latex paint at one point, so the Krud Kutter pretty much melted that paint off. Under the latex paint was much harder enamel. For this, I used steel wool and 220 grit sandpaper, to smooth out any scratches and imperfections. Since I'm pretty sure the original paint was lead-based, I made sure to wear a face mask and sanded the paint wet, to eliminate any dust flying around. For the most part, the cabinets were relatively rust-free, but in the cases that there was a bit of rust, I hit those areas with heavy-duty sanding attachment on a drill. I then treated the area with some rust killer solution, to prevent any further rusting. In the few cases where I needed to fill dents or holes, I used Bondo to fix them. Other than those portions not being magnetic, you can't tell the difference once they had been painted.
Lower cabinet stripped and ready to be painted.
Upper corner cabinet and door primed and ready to paint.
Once the cabinets were cleaned, stripped and sanded, I applied two coats of Rust-Oleum Primer. Once that was done, I finished them with three coats of Rust-Oleum High Performance Enamel. Wherever I could, I masked out the original Youngstown Kitchen labels so that they would not be painted over. Originally, I was going to try to spray the paint, but that was taking too long and wasn't covering too well, so ultimately decided to roll the paint on with a microfiber roller. The result isn't as smooth as you might get with a professional auto body paint job, but even with the little bit of texture from the rollers, the cabinets look great.
One of the lowers complete
The inside of the lazy-susan, all painted
Orignal Formica and Youngstown Kitchen labels.
All the cabinets complete and ready to be installed.
I worked on about 5 cabinets at a time, since that was the most I could fit in the barn workspace at once. In addition to those from Rhode Island, I also had to add the cabinets from our original kitchen to my to-do pile. I worked on these from about late August straight through till mid-November. I managed to finish the last cabinet days before they guys were ready to hang them on the newly painted walls.
While they were hanging the cabinets, I was working on the last piece which was the sink base. The one we bought from Rhode Island was rusted through and we were pretty sure we would just have to scrap it. The face of the sink base was still in decent shape and our contractor took a look at it and determined that we could probably use that portion. They built a wooden frame for the sink base and I stripped and cleaned the front of the Youngstown sink base. When I was done with that, they cut off the rusted sides and bottom, I then repainted the face of the sink base, which they then attached to the wooden frame. The result was a sink base that matched the rest of the cabinets, but without all the rust.
Rusted Sink base, getting cleaned up.
Newly refinished sink base front, with the rusted bits gone.
Custom wooden sink base, during construction
Sink base front, mounted onto the front of its new wooden base.
Tools required for fixing the hinges; Pop-rivet tool, washers and steel rivets. The broken hinges are shown in the lower-right.
The cabinets were hung without their doors and drawers, so my next step was to clean the door pulls and fix any hinges that needed fixing. The hinges posed a problem as they are very specific to these cabinets and are no longer manufactured. After 60+ years of holding heavy, metal doors many of the hinges were loose or broken. The hinges were riveted in the middle which was the main point of failure. A few of our cabinets even had nails and screws holding the hinges together. I looked for months to try and find a suitable replacement, with no luck. My only option was to repair the ones I had. I took a set of hinges to my dad, who showed me how to replace the rivets with new ones. I first had to drill out the old rivets. Do do this, I clamped them down, to keep them from moving and then with a titanium metal drill bit I drilled through the rivet until it fell out of the hinge. To make sure it didn't overheat or explode, I made sure to oil the bit and hinge with machine oil and drill slowly.
Just call me "Rosie the Riveter"!
I then aligned the hinge and put a new pop rivet in place. To make the hinge a bit tighter, I also added a small washer to the end of the rivet. I then took pop-rivet gun and attached the rivet by squeezing the riveter a few times. The result was a newly working hinge. Fortunately I didn't have to do this to all of the hinges. This was lucky because the pop-rivets leave a bit of a stem on the top of the hinge. This stem doesn't interfere with anything when placed at the top or bottom of a door, as long as there isn't another door or drawer right above or below it. So, for instance, any lower cabinet that had a drawer above a door, I was only able to use the new hinges on the very bottom of the doors, not the tops, as those would hit the drawer above it.
Step 1: Secure the hinge in a vice.

Step 2: Drilling the old rivets out of the broken hinge.
Step 3: Align the two parts of the hinge, so that the holes line up.
Step 4: Insert the rivet through the holes on the two halves of the hinge, so that the flat part of the rivet is flush with the inside of the hinge.
Step 5: Place a washer on the end of the rivet.
Step 6: Insert the long end of the riveter into the rivet tool.
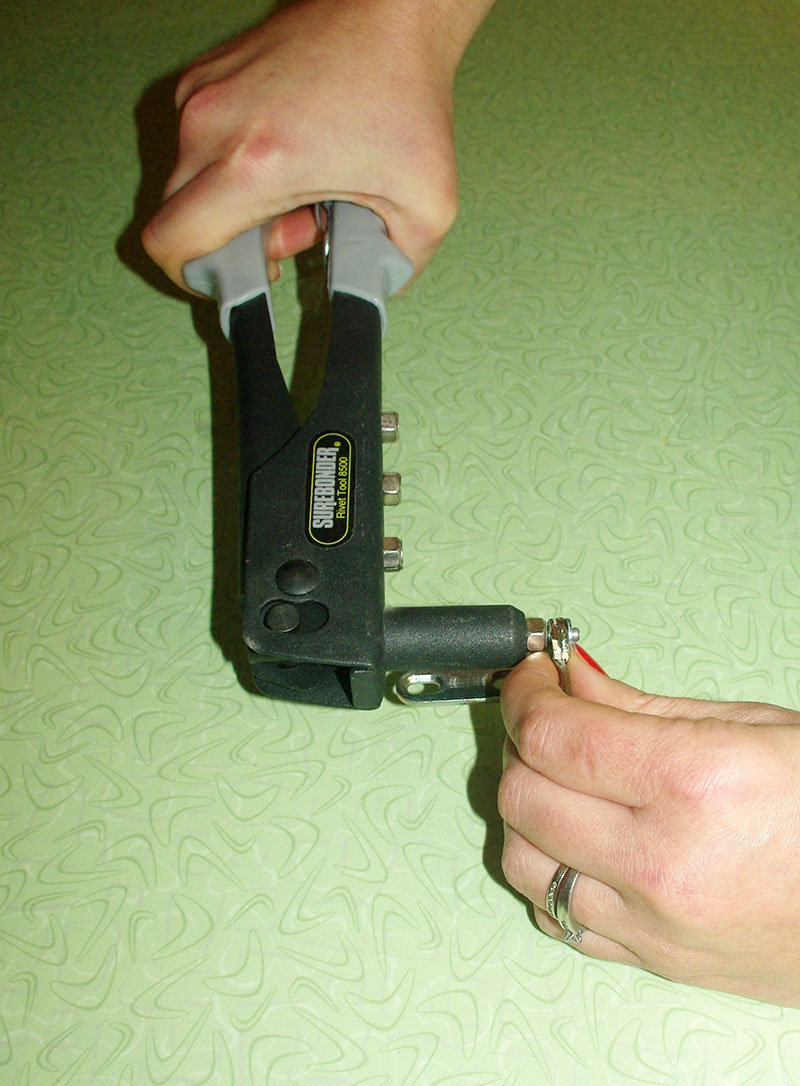
Step 7: Squeeze the handles of the riveter a few times until the tail of the rivet breaks off and the two parts of the hinge are connected.
The repaired hinge with its new rivet.
Once all of the hinges were repaired, Chris and I started the task of hanging all the doors. For the most part, this went fine. Since the cabinets are metal, they do twist some, so some of the doors no longer hung straight. Norm was able to add some shims to the back of the cabinets to straighten them out and it worked fine. In one case, the original latch had broken, so the doors wouldn't stay closed. On this cabinet, I just added some small rare-earth magnets and they helped keep the doors closed with no problems. Once the doors are closed, you can't even tell that they are there. When it came to the lower cabinets, however, we ran into some much bigger issues. There are no installation instructions for these cabinets, so the lazy-susans were placed a half an inch further back than they should have been. The result was that the cabinets next to them were interfering with the lazy susan doors and making them unusable. Fortunately, the lower cabinets had been shimmed off the walls, so there was room to move them back. Once that was done, all the doors and drawers were able to function properly. The lazy susan cabinets are still a bit further back than they are supposed to be, but since everything functions, we aren't too worried about it.
24" cabinet, lazy-suzan corner cabinet and 4-drawer cabinet, all installed.
The door pulls were a much easier issue to deal with. A few years ago, I had bought a bunch of extra pulls on eBay, so I was able to pick through the pulls I had and use only the very best ones for our new kitchen. Years of use had made them a bit dingy, but I was able to clean them up with Krud Kutter and then shine them up with Simichrome polish and they were as good as new.


These handles also have plastic spacer pieces that go between the handles and the cabinets. Over the years, the plastic on some of the spacers have yellowed quite a bit. I was able to brighten a bunch of them, but wasn't able to get all of them clean enough. I also wanted to make sure I had some backups in case anything happened to some of them. To do this, I made a silicone rubber mold from one of the spacers and then filled the mold with some white resin, which created a nice clean spacer that could replace some of the yellower ones.
The silicone mold, newly molded spacers on the left and old spacers on the right.
The new spacer is on the left and the old, yellowed spacer on the right.
My final task was to line all the shelves with shelf liner and the drawers with vintage Con-tact paper from the 50s, 60s and 70s, that I had collected. Refinishing these cabinets was a massive amount of work but seeing them in our shiny new kitchen made it all worth it. It is very satisfying to know that I did the work myself and that I saved these from ending up in a scrap heap. We weren't able to use all that we bought so I still have about 10 cabinets left, which I'll refinish and use in our barn for storage and maybe try to sell the ones that aren't needed.
Shelf liner
Fun vintage Con-Tact paper. I used a different pattern for every drawer.