Santa Snifter Candy Dish
I was recently looking through some old family photos an spotted an adorable Santa candy dish in the background of a few of them. My husband helpfully pointed out that it was made from a brandy snifter and suggested that I make my own. I found a snifter at Goodwill for 50 cents, gathered my crafting supplies and got to work.
It was a very quick and easy project to do.
Interested in making one for yourself? Below are instructions and patterns so you can do just that!
My Grandfather, Dad and Aunt, Christmas, 1962. The Santa snifter can be seen in the upper left of the photo.
The Santa snifter makes an appearance again, this time in storage in the china hutch.
Vintage-style Santa Brandy Snifter Instructions
My finished Santa Snifter
6” Brandy Snifter (NOTE: If you use a different sized snifter, you may need to resize the pattern pieces to fit.
Felt sheets: Red, white, green, pink and black
A variety of trimmings: Fringe, sequins, ribbons, rhinestones, rick-rack, etc.
1 medium red pom-pom
1 medium white pom-pom
Glue: I used both craft and hot glue. I found the hot glue set the fastest and worked the best. Make sure whatever you choose will work with both glass and fabric.
Scissors
Pattern pieces provided or make your own
STEP 1:
Cut all the pieces for the face. I used white felt for Santa’s mustache and the outside of his eyes, red for his mouth, pink for his cheeks, and black for the inside of his eyes. For his beard, I decided to use some white fringe I had lying around, but you can also cut this from white felt as well.
In the patterns I’ve included two styles each for the eyes, mustache and beard. I used a medium-sized red pom-pom for his nose, but you could cut a piece of felt for this as well. Glue each face piece to the glass and allow to dry.
Some of the felt pieces for his face.
The snifter with the face beginning to take shape
The finished face.
STEP 2:
For the hat, cut the main hat piece from red felt and the brim piece from white. If you are using the pattern pieces I provided, you may need to adjust the size of the hat to fit the circumference of your brandy snifter.
Run a bead of glue along one of the straight edges of the hat. Fold the hat piece in half, vertically, overlapping the ends slightly to glue the seam in place. I placed a piece of packing tape on the inside to temporarily hold the seam together while the glue set.
The main hat piece.
Gluing the seam of the hat. The tape can help temporarily hold the hat together while the glue dries.
Fold and glue one edge of the hat over the other to create a seam.
STEP 3:
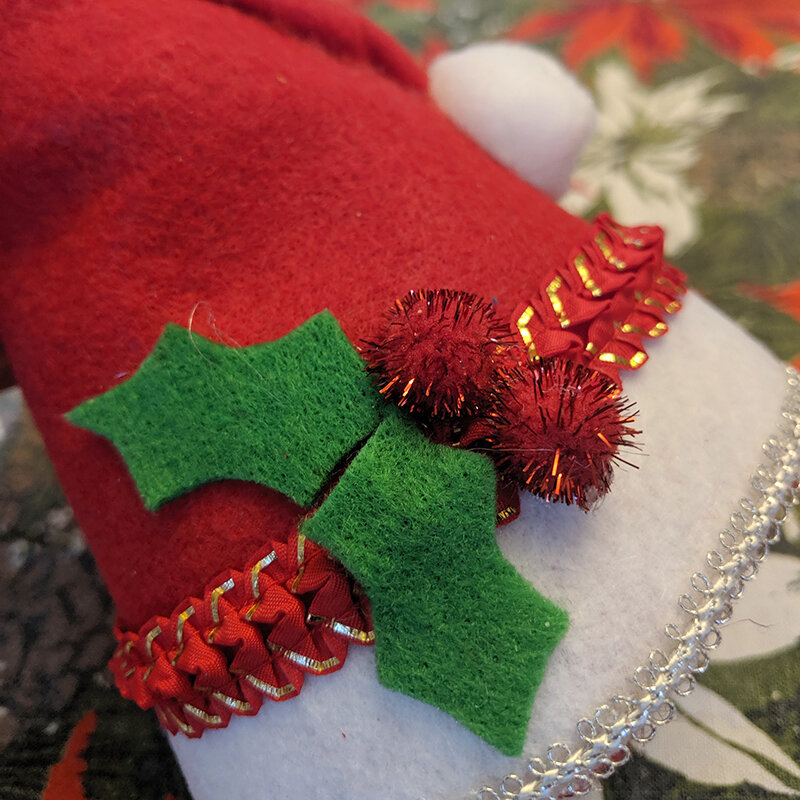
Trim the edge of the hat however you’d like. I used white felt and then trimmed that with some vintage trims that I had. I finished it off with some felt holly and pom-pom berries.
Some of my vintage Christmas trims
The back of the hat. Make sure all your trims begin and end at the back seam.
Santa’s hat all decorated with fancy trimmings.
STEP 4:
Finally, fold the tip of the hat down to a position you like and glue in place. Glue a white pom-pom to the end. Stuff the very end of the hat to give it shape. I used some scraps of felt, but you could also use poly-fill.
The tip of the hat folded down and glued in place
The inside of the hat
Just fill the snifter with candy, pop on the hat and you have your very own Santa Snifter Candy Dish!
The finished candy dish


