Restoring a Vintage Kitchen Light
When we renovated our kitchen in 2017 we spent a lot of time looking at lighting but we never quite found the right thing. Most of the new lighting we looked at was expensive and not the look we were going for. We settled on a simple bent glass fixture which was neutral looking and very afforable, at under $20. At that price, we knew if we ever found the right thing and swapped it out, we wouldn't feel like we wasted money. We finally found the perfect fixture last week.
The original bent glass fixture.
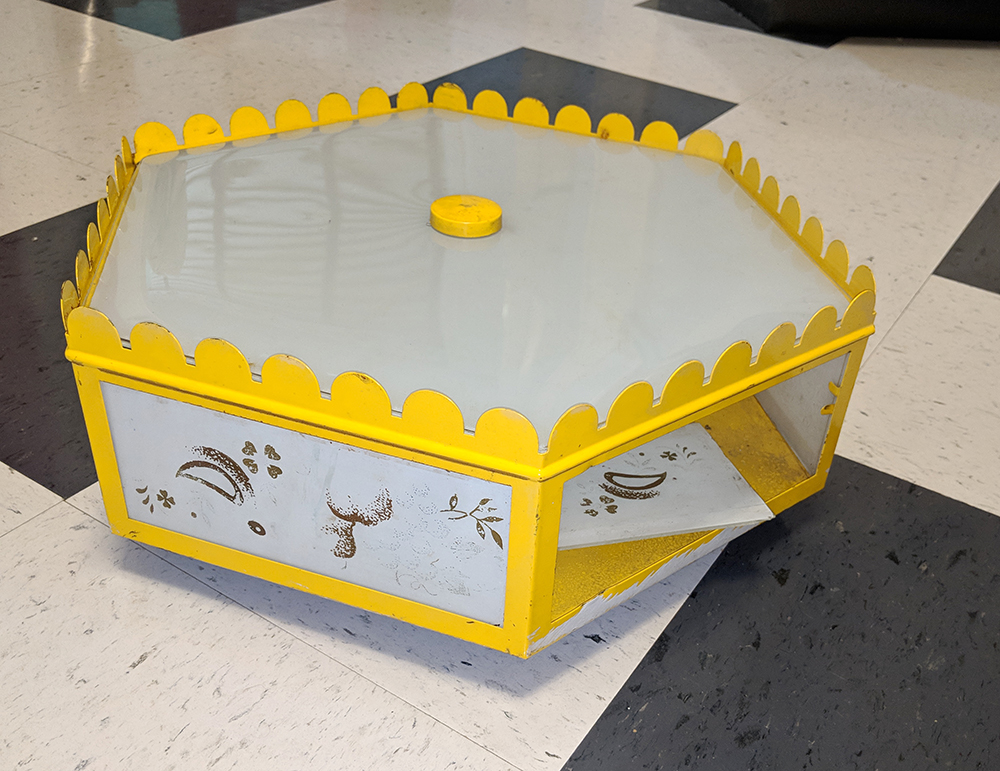
The light fixture before restoration.
Our friend Carol had sent me an email about the Vintage Bazaar New England taking place at the Cumberland Fair Grounds, in Cumberland, Maine. Since Chris had a long weekend and we didn’t have anything planned, we decided to head on up and check it out. The Vintage Bazaar was a large outdoor market with about 200 vendors selling vintage and handmade items. It also had food, music and a display of vintage and retro campers. After walking around the bazaar we came across a vendor selling a huge amount of vintage salvage. At the same time Chris and I spotted and made a beeline for a yellow light fixture sitting on one of the tables. The vintage metal fixture was missing some of its glass panels and had terrible looking wiring, but I knew that A: I could definitely fix it up and B: we found our kitchen light. The vendor was only asking $10 for it, so we snapped it up. There were no markings on the fixture but based on the color and what was left of the design of the glass, I’m guessing this light to be from the mid to late 60s.
We wanted this light installed in our kitchen as soon as possible, so I got started fixing it up immediately. The first thing I did was to take out the glass and clean it up. It had about 50 years worth of grease all over it so it took some time and lots of Krud Kutter to get it clean.
This is what 50 years of bacon grease looks like.
The light cleaned of grease and dirt.
The inside of the fixture
The perfect jadeite green
The original yellow paint was in actually decent shape and it seemed kind of a shame to cover it up, but it didn’t really match our kitchen, so I decided to paint it a light green instead. I found a shade from Krylon, called “Pistachio” that went perfectly with my green countertops and jadeite kitchen decor. The shade of green also matched the walls of our porch.
Krylon “Pistachio” paint along with some of the other products used for this project.
The next problem to tackle was replacing the glass. The fixture was missing two panels of glass and those that remained had the remnants of a pattern, which had worn off over time. I went to a glass shop to purchase acid-etched frosted glass, but was quoted $48 for 6 small pieces of glass. I wasn’t ready to pay that kind of price so instead, I went to my local hardware store and had the panels cut in regular glass for only $3 and decided to frost them myself. Upon closer inspection of the original panels I realized that they were painted white, rather than etched, so I tried to replicate that using white spray paint but the results were either too opaque or uneven. I then tried some glass etching cream and while that probably works fine for small pieces, it really isn’t meant to cover large flat areas so you could really see the brush strokes which was not ideal. I finally settled on Krylon Frosted Glass spray paint. I put about 3 coats of the paint on the glass and then did a final coat of spray lacquer to protect it.
I initially had plans to paint a design on the glass but then remembered that I had a bunch of vintage 1940s water slide decals that might work. Water slide decals were quite popular in the 40s and 50s and were used to decorate everything from kitchen cabinets, to glassware and everything in-between. I happened to have some in a strawberry motif that matched our kitchen decor perfectly. To use, I just needed to soak the decal in warm water for a few minutes and then slide them off the paper onto glass. Since mine were so old, some didn’t work, but I eventually found enough decals that did. Not wanting to block too much light, I decided to put the decals on every other glass panel, rather than all of them. Once the decals are dried, they are pretty durable.
Vintage Meyercord water slide decals.
The decals in water
Strawberry decals on the final fixture
Next it was time to replace the old wiring. I happened to have a new 3 bulb fitting that was the same as the original, minus the sketchy wires. Because we weren’t sure if the size was exactly the same, I removed the upper and lower brackets from the new fixture and replaced them with the originals.
The old and new wiring
Brackets removed
The new wiring with old brackets
Chris and I then took out the old fixture and installed the new one and our kitchen had its new light! This was a quick and fun restoration project. I worked on it over a week, but most of that was researching frosted glass effects and waiting for the paint to cure.
The restored fixture installed.
All lit up!
I love the way this looks against the scalloped trim.
We couldn’t be happier with the way it turned out. It fits in perfectly with our kitchen decor and I especially love the way the scallops look against the scalloped trim over our sink. We are very glad we waited until we found the right fixture because we can’t think of one that fits in more perfectly.
Our kitchen with it’s new light
Looking towards the porch.
Another view of the new light.


